Menu


A Satisfactory Roadmap 2025 and Beyond

The factory building landscape of Satisfactory is constantly evolving, and as we look towards 2025, it’s crucial to understand the trajectory of this complex and engaging game. While the developers, Coffee Stain Studios, haven’t laid out a concrete roadmap for 2025 specifically, we can piece together a picture of what’s likely in store by examining past updates, confirmed plans, and the overall development direction. This deep dive will explore Satisfactory Roadmap 2025 – potential features, content additions, and improvements that players can anticipate in the coming years.

The Foundation: Update 8’s Impact

Before peering into the future, it’s important to acknowledge the substantial changes brought by Update 8. This update marked a significant shift, notably with the upgrade to Unreal Engine 5, a move that promises enhanced visuals and performance optimization. Beyond the technical leap, Update 8 introduced several gameplay-altering features.

Power Infrastructure Overhaul

The introduction of the Power Tower and the Priority Power Switch fundamentally altered how power distribution is managed. The Power Tower significantly extended the reach of power lines, and the Priority Power Switch allows for more strategic power allocation.

Mobility Enhancements

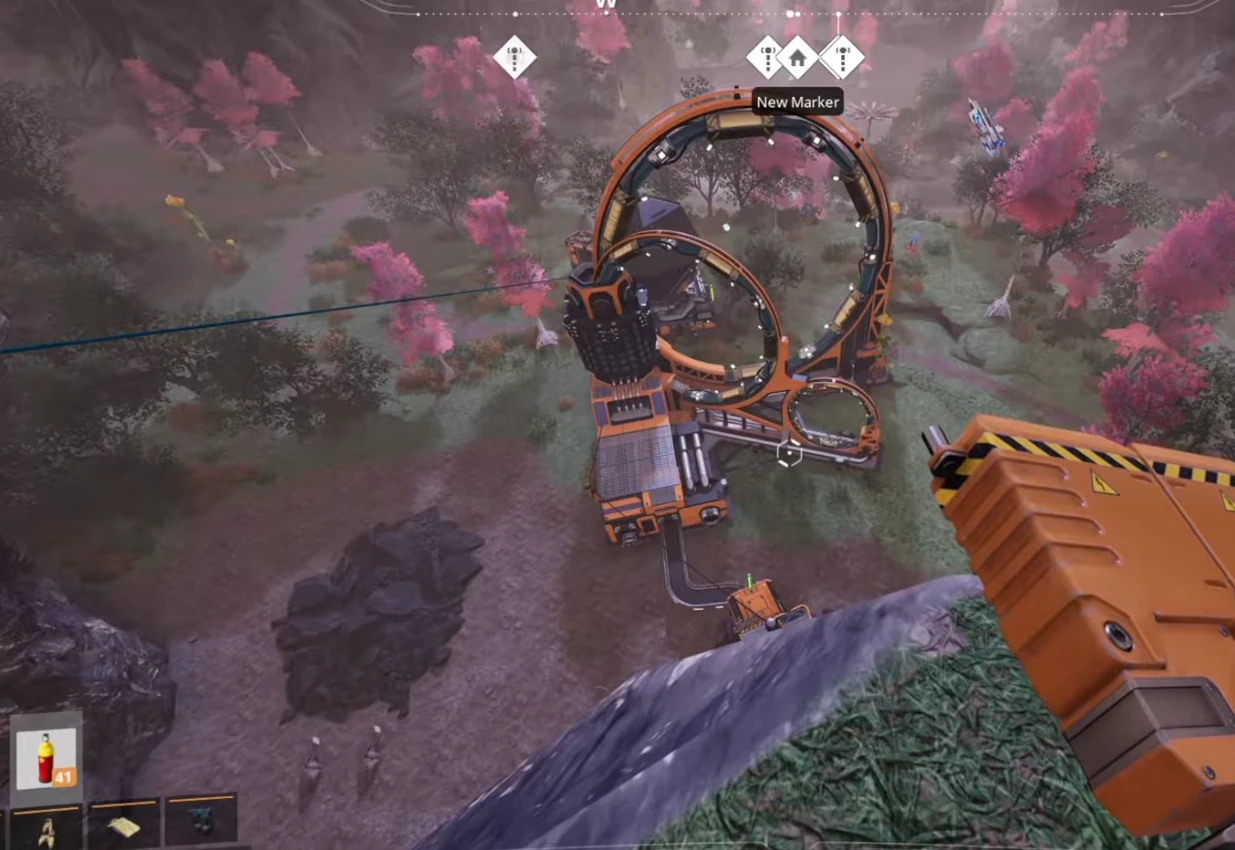
Update 8 made parachutes reusable and boosted the pioneer’s movement during gliding. Ziplines also became more fluid, no longer interrupted by ceiling connections. Fuel options for jetpacks were expanded to include Solid Biofuel, Liquid Biofuel, Turbofuel, and standard Fuel, each with distinct performance characteristics.

Building and Dismantling

Quality-of-life improvements included auto-supports for conveyor belts and pipes, plus adjustable height for the first support. The dismantle system gained filters, and blueprints became more versatile with quick switch menus, directional arrows, and the new “nudge mode”.

Advanced Game Settings (AGS)

A slew of new AGS options provided players with the tools to tailor their experience. Features like flight mode, god mode, item giving, no build cost, and no unlock cost offer unprecedented levels of customization. Other features included disabling enemy spiders, setting starting tiers, and unlocking all available content.

These changes underscore Coffee Stain Studios’ commitment to enhancing both the core building mechanics and the overall user experience. While the specifics of Update 9 and 10 were ultimately passed over, the developments implemented in Update 8 provide a strong base to build from.

Looking Ahead: What’s On the Horizon?

While a specific roadmap for 2025 is not available, the announcements about the 1.0 release provide essential context for future developments. The full release is set for September 10th, 2024, which will include many changes:

The Story Update

One of the most highly anticipated features coming with the 1.0 release is the introduction of a story mode, a feature repeatedly confirmed by the developers. It is said to be fully written and undergoing prototyping, promising to be a unique addition for players. The story will incorporate items such as SAM Ore, Mercer Spheres, and Somersloops, which will finally be properly implemented. It is expected that some items might only be available through story progression, adding depth to the game.

Biome Overhaul

The 1.0 release will also introduce changes to various biomes, such as the Red Bamboo Fields, Red Jungle, Swamp, Abyss Cliffs, Titan Forest, and Desert Canyons. These areas will undergo both foliage and landscape changes, which could affect factory designs. One significant change is that Paradise Island will be removed entirely. These alterations indicate a commitment to refreshing the game’s environments.

Addressing Unspecified Features

Coffee Stain Studios has also discussed the possibility of revamping the game’s tutorial and early-game experience to make the game more approachable for new players, though the method for this is still unspecified. The issue with multiple fuel types for equipment was also acknowledged, and it is expected that the UI/engine issues will be resolved to enable its functionality.

Speculating on 2025: Building on the 1.0 Foundation

Given the significant changes coming with the 1.0 release, 2025 will likely focus on expanding upon these changes. Here are some likely areas of focus:

  • Story Expansion: With the base story implemented in 1.0, 2025 could see further story content additions. This might include new narrative elements, side quests, or updates that provide more insight into the game’s lore.
  • New Biomes and Environments: Although the focus of the 1.0 release will be updating existing biomes, there might be new biomes added later to further expand the variety of the world.
  • Enhanced Gameplay Mechanics: The focus on refining and expanding existing mechanics is likely to continue. This could involve more quality-of-life improvements, new building options, and further optimization of the game’s performance.
  • Community-Driven Content: Coffee Stain Studios has been very receptive to community feedback. Expect further refinements to features based on player input. This might include mod support or in-game content that the community has been requesting.
  • Continued Advanced Game Settings (AGS) Expansion: AGS is a major addition for players seeking tailored experiences. More options and settings may be added to further customize gameplay for both seasoned and new players alike.

A Bright Future for Satisfactory

While a definitive roadmap for 2025 remains under wraps, the overall development direction of Satisfactory provides a clear picture. The 1.0 release marks a major milestone with its inclusion of a story mode and map adjustments. The years following will likely focus on expansion and refinement, and a continued effort to enhance the game with community feedback and new features.

As we gear up for the 1.0 release, the future of Satisfactory looks incredibly bright, with plenty of opportunities for players to continue building, optimizing, and enjoying their ever-expanding factories in the years ahead.


Ore Scanning Bug? More like Ore-some headache


Satisfactory Resource Gathering

Satisfactory Resource Gathering

Alright, listen up, you magnificent bastards, because we’re diving headfirst into the glorious mess that is resource gathering in our beloved Satisfactory. You know, that game where you start with a freakin’ stick and end up running a multi-planetary industrial empire? Yeah, that one. So, picture this: you’re fresh off the drop pod, ready to slap down some foundations and start churning out iron like a goddamn machine. You hit that resource scanner button, expecting the world to light up with juicy nodes just begging to be exploited. But then, bam! You get a big ol’ middle finger from the game, and only one measly node shows up. Just one. It’s like going to a buffet and only being allowed to grab a single bread roll. What in the name of overclocked power plants is going on?

It seems like some poor souls have been running into this issue, and it ain’t pretty. You’d expect your scanner to do what it’s supposed to – scan, not give you the silent treatment. I mean, who has the time to run around like a headless chicken, stumbling blindly towards the next mineral deposit? We’re not here to play hide-and-seek, we’re here to conquer the planet with our beautifully organized (or chaotic, depending on your mood) factory!

Now, some smart cookies in the comments pointed out a couple of things. First off, the scanner ain’t exactly a map marker placement wizard. It scans. That’s it. It doesn’t go around painting the map with resources like some kind of graffiti artist. So, if you’re seeing a resource marker that looks like it was stamped on the map by a toddler wielding a crayon, it’s probably something you did, not the scanner. Which, let’s be honest, is sometimes more embarrassing.

Also, some folks mentioned that the scanner only pings resources within the map UI window. Meaning that if you’re zoomed all the way out, don’t expect it to show the nodes on the other side of the world. It’s like a lazy intern at the survey department, only caring about what’s directly in front of their face. But what if the game used to show more? Now we are starting to think about what changed…

And that’s when the real kicker came in. Drumroll, please… it’s the mods! Yep, it turns out that one particular mod, \”Refined R&D,\” is the culprit behind this whole mess. Because what is the point of a fun game without a little bit of unintended consequences from modding, right? I mean, half the fun is breaking things and then trying to figure out why. This particular mod seems to be messing with the resource scanning mechanic, causing it to only highlight one node at a time, instead of all of them in range. So, if you’re running that mod, maybe think about disabling it or, if you are a masochist like me, trying to find out what is really the problem.

But this brings up a bigger question – is it really a bug if it’s caused by a mod? It’s like saying your car is broken after you decide to install a jet engine on it. The game is doing what it’s supposed to, you just did a little bit of tweaking. Or maybe this is all because of a game update. Who knows?! And honestly, does it really matter? We’re all just trying to build epic factories in peace. It’s all about having fun with those buggy, glorious machines. I personally spent way too much time trying to figure out how to make efficient nuclear power, and I have no regrets.

But hey, at least we got to the bottom of this mystery, didn’t we? No more scratching your heads in confusion, wondering why the resource scanner is being a turd. It’s either that pesky mod or the game messing with you for some unknown reason. The game is full of those little moments, isn’t it? The unexpected glitches, the spaghetti setups, the constant struggle to get enough power. It’s all part of the charm. And now, I need to figure out why my trains are going in circles. Back to the factory!

Anyway, if you are not using mods and have this bug, maybe the Satisfactory Wiki might help. The guys there know their stuff. This link is more reliable than me.

Now, excuse me while I go automate something completely unnecessary. You should do the same.


Train Troubles in Satisfactory


Train Troubles in Satisfactory

Train Troubles in Satisfactory: A Deep Dive into Signaling and Route Planning

Alright, fellow engineers, let’s talk trains in Satisfactory. We all know the feeling: you’ve got your factory humming, belts are flowing, and then you decide to introduce the glorious, high-throughput solution that is rail transport. And that’s where the head-banging begins.

The Shortest Path Predicament

The core of many train-related headaches in Satisfactory lies in one simple rule: trains always take the shortest path. This isn’t just a guideline; it’s the fundamental law of the rails in this game. Unlike some other factory builders, Satisfactory trains calculate their route at departure and stick to it like a stubborn mule. They don’t dynamically reroute or recalculate, and this is where many players find themselves stumped.

This leads to some interesting scenarios, particularly when trying to manage multiple trains at a single station. Say you want trains to bypass a station if it’s occupied, and instead, take a passing lane, or a holding track. Seems logical, right? You build a nice little detour, expecting the game to be clever enough to direct trains around congestion. But alas, the game is not that smart. The trains will stubbornly try to use the shortest way, even if blocked, leading to congestion and delays. This isn’t a bug; it’s by design. The game’s focus is on efficient factory design, not train management, which is a key difference to titles such as Factorio or OpenTTD.

The Illusion of Control: Signals and Their Limitations

So, if the game’s pathfinding is so rigid, what about signals? Surely, those give us some control, right? Well, yes and no. Signals in Satisfactory don’t reroute trains. Instead, they act as traffic lights, dictating when a train can enter a section of track. They divide your rail network into blocks, which is crucial for preventing collisions, and are critical for building efficient train networks. Block signals ensure only one train occupies a block at any time. There are also path signals that allow for more complex intersections. However, they don’t have any influence on which path the trains take, as in, they won’t tell the train to use a passing lane to avoid a busy station.

The One-Way Solution

One popular and effective method to get around this is using one-way tracks, which are often a good idea anyway. Instead of having trains go back and forth on a single track, you create separate lines for each direction. This, in itself, resolves a lot of congestion problems. It means the shortest path for a train will always be the correct one. However, this might be more expensive and require a lot more space.

Passing Loops: Making the Shortest Path Work for You


Powering Up Your Factory: A Beginner’s Guide to Biomass Burners in Satisfactory


Powering Up Your Factory: A Beginner’s Guide to Biomass Burners in Satisfactory

Powering Up Your Factory: A Beginner’s Guide to Biomass Burners in Satisfactory

So, you’ve just dropped onto the alien world, ready to build the most efficient factory this side of the galaxy. You’ve got your hub, some basic resources, and a burning desire to automate everything. But then you hit a wall – the dreaded ‘No Connection’ message on your biomass burner. Fear not, fellow engineers, for I’ve been there, and I’m here to guide you through the initial power struggles in Satisfactory.

The Biomass Burner: Your First Power Source

The biomass burner is your starting point for generating electricity. This humble machine converts organic matter into usable power, and it’s essential to get your factory up and running. Think of it as your trusty little generator for the early game. It’s not pretty, it’s not efficient, but it’ll get the job done.

Getting Connected: Cables and Power Poles

The ‘No Connection’ error means your burner isn’t linked to any power grid. To solve this, you’ll need to use cables and power poles. Here’s the basic process:

  1. Fuel Up: Gather some leaves, wood, or any other biomass material. Craft these into biofuel using the crafting menu.
  2. Load the Burner: Open the biomass burner interface and place the biofuel inside.
  3. Connect with Cable: Equip the cable in your hand and interact with the biomass burner. You’ll see the connector highlight. Now, run the cable to a power pole. These can be placed anywhere and are used to create a power grid.
  4. Connect Machines: From the power pole, connect further cables to your machines that need power, like the smelter.

It’s a basic daisy chain: Burner -> Cable -> Power Pole -> Cable -> Smelter. The initial power pole can handle up to four connections. This process forms the backbone of your early power system and is key to moving beyond manual crafting.

Manual Crafting: Tapping Instead of Holding

Speaking of manual crafting, you might find yourself spending a lot of time holding down the spacebar to craft basic items. Here’s a pro-tip: you don’t need to hold the button at all! Simply tap spacebar, and it will keep crafting until it runs out of resources. This small change can save you a lot of finger fatigue.

Automating Biofuel Production

As your factory grows, you’ll quickly realize that manually gathering biomass and crafting biofuel is unsustainable. To automate this process, build a constructor. You can feed leaves and other organic matter into the constructor to automatically create biofuel. This will streamline your initial power generation and keep your machines running.

Power Grid Management: Connecting Multiple Sources

One key aspect of Satisfactory is the ability to connect multiple power sources together. You can link different biomass burners into a single grid to increase your overall output. However, beware! If one generator runs out of fuel, it will trip the breaker and shut down the entire system until the empty generator is refueled and restarted. This makes power management a crucial aspect of keeping your factory stable.

Beyond Biomass: The Future of Power

While biomass burners are essential for the early game, they’re not the end of your power journey. As you progress through the tiers, you’ll unlock more efficient power sources, such as coal generators, fuel generators, and eventually nuclear power. The key is to start with the basics and gradually upgrade your power infrastructure as your needs evolve.

Common Pitfalls and How to Avoid Them

  • Misunderstanding Machines: It’s easy to confuse the biomass burner with other machines like the smelter. Remember, the burner creates power, and the smelter uses power to refine resources.
  • Ignoring the Tutorial: The in-game onboarding is there for a reason. Listen to ADA; she provides valuable guidance that will help you avoid common pitfalls and understand the game’s core mechanics.
  • Overlooking In-Game Guides: The in-game guide can be your best friend. Press ‘N’ and type what you’re trying to make. It’ll show you the steps and what you need. This is much faster than trying to search online for the information.
  • Power Grid Issues: Always double-check that cables are properly connected and that no power sources are running out of fuel. A single break in the chain can bring your entire operation to a standstill.

Learning the Ropes

Starting a game like Satisfactory can be overwhelming. There are many systems to learn and no single path to success. The key is to be patient, experiment, and learn from your mistakes. Don’t be afraid to ask questions; even the most experienced engineers started somewhere. And don’t get discouraged by those who seem to have everything figured out. We all have to start with the basics.

Final Thoughts

Satisfactory is a game about experimentation, problem-solving, and the sheer joy of building complex machines. From the humble biomass burner to the vast power grids you’ll create in the late game, every step is part of a larger, rewarding journey. So, take your time, learn the ropes, and most importantly, have fun creating the most efficient factory this alien planet has ever seen. You can check out a fantastic resource for all things Satisfactory on the Satisfactory Wiki. Keep building, pioneers!


Mastering Train Logistics in Satisfactory: A Comprehensive Guide


The Great Train Debate: Mastering Railway Logistics in Satisfactory

The Great Train Debate: Mastering Railway Logistics in Satisfactory

So, you’ve decided to conquer the logistical challenges of Satisfactory and dive into the world of trains? Fantastic! Trains offer a significant step up from belts, allowing you to move massive quantities of resources across your sprawling factories. However, as many pioneers have discovered, the nuances of train signaling and pathfinding can quickly turn a seemingly simple task into a head-scratching puzzle. Let’s delve into the core of the most common issue: train pathing and how to get those locomotives to cooperate.

The Shortest Path Conundrum

The heart of the problem lies in the way Satisfactory’s trains operate. Unlike some other factory games where trains dynamically recalculate routes, Satisfactory trains choose their path when they depart from a station and stick to that route. They will always, without exception, take the shortest path to their destination. This behavior, while seemingly simple, leads to complications when trying to implement more complex railway designs, especially when you want a train to bypass a station that’s already occupied.

Bidirectional vs. Unidirectional: The Eternal Struggle

One of the first major considerations when setting up your rail network is whether to use bidirectional or unidirectional tracks. Bidirectional tracks allow trains to travel in both directions on the same line, while unidirectional tracks dedicate a single track for each direction of travel. While bidirectional tracks might seem more space-efficient at first glance, they often become a headache when traffic increases. The biggest problem with bidirectional tracks is managing conflicts; two trains wanting to use the same segment in opposing directions can cause deadlocks, halting the entire system. The main issue arises from the trains lack of path recalculation, as they will not reroute themselves when encountering an obstacle.

Unidirectional setups offer much better control and scalability, as they eliminate the possibility of head-on collisions and simplify signal placement. In such a system trains can move freely in their designated direction. Although the initial construction might require a larger footprint, this cost is often negligible when the increased efficiency and simpler signaling are taken into account. In my opinion, the long term benefits of unidirectional tracks far outweigh the extra planning required at the beginning.

The Passing Loop: Myth or Reality?

Many players, myself included at the beginning, have tried to create a passing loop where trains bypass a station if it’s occupied. The idea seems logical enough. You create a side track around the station. A train should take the side track if the station is blocked, right? Unfortunately, it’s not that simple. The core issue is that trains always choose the shortest path when they depart and won’t deviate from it, ignoring the station occupancy entirely. This makes a classical passing loop not work as intended.

However, there is a way to leverage signals to achieve something similar. You cannot have a passing loop in the same direction, but you can have one in the opposing one. By placing block signals correctly, you can create a system where the train will be forced to take a route, but not in the way you might first think of. The key is to create a situation where the “shorter” path is actually the one you want, due to the signal placement.

Signals: The Language of Trains

Understanding how signals work is crucial to making your rail network efficient. There are two main types of signals in Satisfactory: block signals and path signals. Block signals divide the track into segments called blocks. Only one train can occupy a block at a time. When a train enters a block, the signal will turn red, preventing other trains from entering. Path signals are more complex and are primarily used at intersections to allow multiple trains to move through a complex area without colliding. Correct placement of both types of signals is needed for a smooth operation.

Advanced Techniques

While basic signaling is sufficient for simple rail systems, more complex networks may require additional considerations. Here are a few advanced techniques:

  • Station placement: Instead of having stations directly on the main line, branch them off to the side. This ensures trains that don’t need to stop at the station will never be slowed down.
  • Stacking stations: When more than one train needs to use a station, instead of having a single platform, create a set of stacked platforms. This can improve efficiency, particularly if you have more than one train using the same station.
  • Train length: Consider the length of your trains. Longer trains require longer sidings and loading areas. Be sure to account for this when planning your infrastructure.
  • Priority Systems: There are no priority systems in the game, so you cannot give certain trains priority. The only way to do this is to make the preferred track the shortest, or use one-way tracks. Some players suggested the idea of a priority signal, but at the moment the only solutions are the described ones.

Conclusion

Train networks in Satisfactory can be daunting to set up at first, but once you grasp the basic principles, the possibilities are endless. Don’t be discouraged by initial failures, I know I was, learning from them is key to mastering the system. Remember to always take into consideration the game’s mechanics regarding shortest paths and train pathing. Take the time to test your ideas and always make sure you have a good grasp on how signals work. Do this and you will be on your way to creating a functional and efficient railway system that will carry your factory into the late game. Happy building, pioneers!

Check out this guide on advanced train signaling techniques for more tips and tricks https://satisfactory.wiki.gg/wiki/Tutorial:Advanced_Train_Signaling.


New Update Nerfs and Changes


I’m excited to dive back into this game after a break, but before I can get started, I have some questions about the latest update. Specifically, I’m wondering if there were any nerfs or changes that could impact my experience.

As I’ve been browsing through the community, I noticed a few tweaks that caught my attention. One of the most significant ones seems to be affecting Digtoise’s partner skill. It used to be super powerful on natural ore nodes, but now it only shines when paired with another skill. This might not be a huge deal for some players, but it does change how people approach resource gathering.

Another area that concerns me is passive skills. It appears that Lucky has become largely useless due to the introduction of “remarkable craftmanship.” I don’t think this was intentional, but it looks like the new skill simply makes Work Speed pals more desirable. As a result, Lucky’s contribution to work speed will be minimal at best.

Ferocious and Impatient skills have also been affected by the addition of Demon God. The problem is that these older skills are now less appealing compared to this new option. Ferocious and Impatient used to provide decent attack power or defensive stats, but they no longer offer as much value as before.

Nocturnal has also taken a hit due to the introduction of Vampirism. While it’s true that vampirism is primarily designed for its life-stealing abilities, it seems like Nocturnal will become less popular now that Vampirism offers a similar effect. This could lead people to abandon their existing Nocturnal builds in favor of this new option.

What might come as a surprise is that these changes don’t feel like nerfs at all. Instead, we’ve received a bunch of buffs and quality-of-life updates across various areas of the game. The addition of level 4 friends, including a new woodcutter, should make life easier for many players. It’s also nice to see some love given to Miners and Handiwork.

Author:

AlexTr1


Smokeless Powder Trouble


Getting smokeless powder can be a real pain when you’re stuck with oil residue. But don’t worry, we’ve got some answers for you.

So, it seems that people are getting stuck on this particular step in the Manufacturing and Assembly Mechanics (MAM) node. I mean, who hasn’t been there? You think you’re doing everything right, but instead of those coveted little vials, all you’re left with is heavy oil residue packaged into large containers.

The problem lies in setting up your refinery correctly. It’s easy to get caught up in the process and miss a crucial step or two. That was my mistake when I first started trying to make smokeless powder. And trust me, it’s frustrating.

So here’s what you need to do:

First off, you’ll need to make some black powder using an assembler. This is where most people go wrong – they forget to actually set up the output correctly. Make sure you’re producing black powder and not compacted coal or sulfur.

Once that’s done, hook up your black powder output to a refinery set to produce smokeless powder. It’s also important to connect this pipe to some heavy oil residue. Yes, you read that right – you need two refineries for this step. I know, it’s confusing, but just go with it.

Now, the final bit of advice: don’t forget about any solid by-product (plastic/rubber/polymer resin) that comes from making that heavy oil residue. You’ll need to get rid of it, whether you send it down the sink or find some other creative solution.

And there you have it – smokeless powder without all the hassle and confusion. I mean, who doesn’t love a good challenge?

Author: AlexTr1


Aluminum Factory Architecture


I just finished building my first aluminum factory and I’m thrilled with how it turned out! The architectural style is something I’ve been experimenting with, trying to create a unique and visually appealing structure that also makes sense from an in-game perspective.

When you look at the exterior of my factory, the first thing that might strike you is the train track entrance. At first glance, it might seem like a weird choice, but trust me, it’s actually very intentional. I wanted to create a sense of continuity with the surrounding environment while also hinting at the industrial nature of the factory itself. The tracks not only add visual interest but also serve as an interesting design element that ties everything together.

One thing that’s caught people’s attention is the lip of concrete sticking out from where the windows are. I get it, it does look a bit tricky! To be honest, it took me some experimentation to figure out how to achieve this look. It’s actually quite simple: you just need to create a half foundation distance and adjust the height accordingly. The key is to not overthink it – sometimes simplicity is the best approach.

As I was building this factory, I had no idea what kind of reaction it would get from the community. Seeing all these positive comments and reactions has been an incredible motivator! It’s amazing how much inspiration can be found in a simple comment thread like this.

What really struck me is that my creation has inspired others to think outside the box (pun intended) when building their own structures. I’m thrilled to see people sharing their own designs, inspired by what they’ve seen here. For those who might not have an architectural background or aren’t sure where to start, don’t worry! Just remember that there’s no one-size-fits-all approach – the beauty lies in experimentation and creative freedom.

Lastly, I want to acknowledge all the amazing content creators out there sharing their own masterpieces on this platform. Stinarchi videos have definitely influenced my style, but I’ve also learned so much from just exploring and building alongside others.

Author: AlexTr1


Automating the Same Old Stuff


I’ve been playing this game for a while now, and I’ve developed my own strategies for managing factories and production lines. One thing that’s always on my mind is how many times I should automate a single item.

For me, it all comes down to how much I need it in the future. If an item becomes crucial for the rest of the playthrough, then yeah, I’ll automate it every time it’s needed. But if I can get away with not automating it at all? I’d rather not waste my resources on building a second factory just for that one component.

I’ve tried to centralize items that come from refineries or constructors before, but in the end, it feels too restrictive and boring. Building multiple factories for different purposes seems way more appealing to me. It’s like playing a puzzle game – every time I find a new recipe, I get excited to figure out how to produce each component efficiently.

Some players might say that’s not efficient, or that they should aim for maximum production output from the start. But honestly? I think that gets boring really fast. There’s something satisfying about solving the problem of producing an item by hand once, and then moving on to something new. It’s a mental block I guess.

I do try to automate every single item at some point or another. But when it comes down to it, I just don’t see the fun in building multiple factories that all produce the same thing over and over. Maybe that’s just me?

On the other hand, there are times where I’ll manually craft an item if it’s just not worth my while to build a whole new factory for it. Resources aren’t infinite, after all!

I’d like to know how you guys handle this – do you automate every single item every time it appears in a recipe? Or do you find other ways to make your production lines more varied and exciting?

Author:

AlexTr1


Satisfying the Satisfactory: Coal Power Conquests


I’m still trying to wrap my head around how quickly some players reach coal power in this game. Currently, I’ve spent a whopping 7 hours to finally get there, and even then, Ada is still giving me a hard time about using the right resources.

At first, it feels like an eternity of gathering leaves and chopping down trees just to fuel those belt-fed biomass burners. But with each restart, I’m getting closer. Maybe not as quickly as others, but I’ll take the progress.

One thing’s for certain – rushing for coal power is no longer the priority it once was. The introduction of belt-fed biomass burners has been a game-changer in my book. No more stressing about resource management; I can focus on building something, anything.

As someone who doesn’t prioritize speed running, I find myself enjoying the game at my own pace. If it takes me 3 hours or 3 days to reach coal power, that’s okay by me. It’s not about beating a timer; it’s about exploring and learning.

Of course, there are those speed demons out there who can knock it out in under two hours. I’m looking at you, high-fuel-consumption enthusiasts! For the rest of us mere mortals, 7 hours is a decent chunk of time to get started with building something more substantial.

Some players choose to skip coal power altogether and dive straight into oil production. Not me; I’ll take my sweet time getting there. After all, it’s not like we’re racing against the clock or anything… oh wait, we are!

When you finally do reach coal power, the sense of accomplishment is unmatched. The struggle is real, but the payoff is worth it.

Author:

AlexTr1

Top