Menu


Is Palworld Crossplay?

The Ultimate Guide to Playing with Friends on Any Platform

So, you’re hooked on Palworld, huh? Who isn’t? Catching Pals, building bases, and surviving in this wild world is way more fun with friends. But there’s one big question on everyone’s mind: Is Palworld crossplay? Let’s dive into the details and get you playing with your buddies, no matter what platform they’re on.

The Short Answer (for the Impatient)

Yes, and no. I know, that’s annoying, but hear me out.

  • PC (Steam & Xbox App) Crossplay: Steam and Xbox App (Game Pass) players on PC can play together.
  • Xbox Console Crossplay: Xbox Series X/S and Xbox One players can play together.
  • Xbox/PC Game Pass Crossplay: Yes, this works.
  • Steam and Xbox Crossplay: Currently not supported.

Why the Confusion?

Palworld is available on multiple platforms, which naturally leads to crossplay questions. The issue lies in technical differences between how Xbox and Steam versions handle multiplayer.

Okay, So How Do I Play With My Friends?

Scenario 1: Everyone’s on Steam

  • Dedicated Server: Best experience. Host or rent one for stable multiplayer.
  • Co-op: One player hosts, others join. Limited by host’s PC and internet.

To Host: Start game, select “Start Game”, enable Multiplayer, set password (optional).

To Join: Use “Join Multiplayer Game (Invite Code)” and enter the code.

Scenario 2: Everyone’s on Xbox (Console or PC Game Pass)

  • Official Servers: Join developer-hosted servers with crossplay support within Xbox/Game Pass ecosystem.
  • Co-op: Host and invite friends using Xbox’s friend list system.

Scenario 3: Some are on Steam, Some are on Xbox

Sadly, no direct crossplay between Steam and Xbox right now.

  • Hope for Future Updates: Developers are working on it, but no timeline yet.
  • Alternative: Play on the same platform if possible (Steam or Xbox).

Dedicated Servers: A Closer Look

  • Hosting Your Own: Requires technical setup, strong PC, port forwarding, and 24/7 uptime for best access.
  • Renting a Server: Easier option via Palworld server hosting. Less hassle, more reliability.
  • Server Settings: Customize difficulty, resources, player limits, and install mods (Steam only).

Troubleshooting Common Crossplay Issues

  • Firewall Issues: Add Palworld to allowed apps in firewall settings.
  • Network Issues: Use stable (preferably wired) internet.
  • Game Version Mismatch: Ensure everyone has the latest game update.
  • Server Issues: Try different servers if one isn’t working.
  • Invite Code Problems: Double-check accuracy of invite codes.

The Future of Palworld Crossplay

Palworld’s popularity has fueled demand for full crossplay. While it’s not here yet, developers have acknowledged it’s a priority. Stay tuned to official channels for progress updates.

Tips for a Better Multiplayer Experience

  • Communicate: Use voice or text chat to coordinate.
  • Share Resources: Teamwork makes the dream work.
  • Specialize Roles: Assign jobs like builder, explorer, fighter, etc.
  • Be Respectful: Don’t grief. Keep it fun.
  • Have Fun! Seriously. Enjoy the ride!

So, there you have it – the complete guide to Palworld crossplay. While it’s not perfect, there are still plenty of ways to enjoy the game with friends. Keep your fingers crossed for future updates. Now go catch some Pals!


Palworld cheat for dedicated server: Using Admin Commands and Exploring Mods

Alright, let’s talk Palworld. Man, this game blew up, right? One minute nobody’s heard of it, the next everyone and their grandma is catching Pals and building bases. And for a lot of us, the real fun starts when you move off the official servers or solo play and dive into running your own Palworld dedicated server. It’s like having your own private slice of the Palpagos Islands, where you make the rules. If you’re spinning up your own instance, a tuned Palworld server hosting box keeps cheats and mods stable for your squad.

Now, when you’re the boss of your own server, you sometimes want… well, let’s call it ‘enhanced control’. Maybe you want to help out a friend who got stuck, clean up some server clutter, or just mess around a bit. This often leads people to search for “Palworld dedicated server cheats”. But here’s the thing: what most people mean by “cheats” in this context are actually admin commands. These are built-in tools the developers included, mainly for server management, but they can definitely feel like cheats sometimes.

This article is gonna break down exactly what these admin commands are, how you, as the server owner or designated admin, can actually use them on your dedicated server, and what some of the essential commands do. We’ll also touch on the wilder world of actual mods, which can introduce features that go way beyond standard admin powers, but come with their own set of considerations.

Just a quick heads-up: We’re talking about using these tools on your own server or a server where you have explicit permission from the owner. Trying to hack or cheat on official servers or someone else’s private server without permission? That’s a fast track to getting banned and just ruins the game for everyone else. Don’t be that person. Let’s keep it cool and focus on customizing our own Palworld experiences.

What Exactly Are “Cheats” on a Palworld Server? Admin Commands vs. Hacks

So, let’s clear this up first. When you search for “Palworld cheats,” especially for servers, you’ll find two main things:

  1. Admin Commands: These are text-based commands you type into the in-game chat window (once you’re logged in as an admin)…
  2. Third-Party Hacks/Cheats/Trainers: These are external programs or modifications not made or endorsed by the game developers…

Here’s the crucial difference for dedicated servers:

  • Admin commands are generally safe to use on your own server…
  • Third-party hacks are risky business.
    • Security: Downloading cheat programs…
    • Stability: These hacks can crash your game…
    • Detection: Even on your own server…
    • Ethics: As mentioned, using these on servers you don’t own is a big no-no.

For the rest of this guide, when we talk about “cheats” for your dedicated server, we’ll primarily be focusing on the admin commands

Getting Admin Powers: Setting the Admin Password

Okay, you can’t just log into your server and start bossing everyone around…

  1. Stop Your Palworld Server:
  2. Locate the Configuration File:
  3. Edit the File:
  4. Find or Add the Admin Password Setting:
  5. Choose a STRONG Password:
  6. Save the File:
  7. Restart Your Palworld Server:
  8. Log In as Admin In-Game:
    /AdminPassword YourChosenPassword

Troubleshooting Tips:

  • Didn’t work?
  • Still no luck?
  • File keeps resetting?
  • Server didn’t restart properly?

Your Admin Toolkit: Essential Palworld Commands (The “Cheats”)

Now for the fun part…

Server Management Commands:

  • /Save – Forces a save.
    /Save
  • /ShowPlayers – Shows who’s online.
    /ShowPlayers
  • /Info – Shows server info.
    /Info
  • /KickPlayer {SteamID} – Kick a player.
    /KickPlayer 7656119xxxxxxxxxx
  • /BanPlayer {SteamID} – Ban a player.
    /BanPlayer 7656119xxxxxxxxxx
  • /Broadcast {Message} – Send a server-wide message.
    /Broadcast Server restarting soon!
  • /Shutdown {Seconds} {Message} – Shutdown with notice.
    /Shutdown 300 Server restarting in 5 mins
  • /DoExit – Force shutdown.
    /DoExit

Player Interaction Commands:

  • /TeleportToPlayer {SteamID} – Teleport to a player.
    /TeleportToPlayer 7656119xxxxxxxxxx
  • /TeleportToMe {SteamID} – Bring a player to you.
    /TeleportToMe 7656119yyyyyyyyyy

Note: Commands like /God, /GiveItem, /SpawnPals are not officially available yet.

Going Further: The World of Palworld Server Mods

Okay, so admin commands give you control, but maybe you want more

Types of “Cheat” Mods You Might Find:

  • Item Spawning
  • Pal Spawning
  • Stat Modifications
  • Gameplay Tweaks
  • Map Tools
  • Experience Multipliers

Where to Find Mods:

Risks and Considerations:

  • Stability
  • Updates
  • Compatibility
  • Server Performance
  • Client-Side Requirements
  • Fairness/Balance
  • Security

Installing Mods on Your Palworld Dedicated Server (General Guide)

Method 1: Simple Pak Mods

  1. Stop your server
  2. Go to Pal/Content/Paks/
  3. Create ~mods folder
  4. Upload mod .pak files
  5. Restart server

Method 2: Mods Requiring UE4SS

  1. Stop your server
  2. Download UE4SS
  3. Extract to Pal/Binaries/Win64/
  4. Check or edit UE4SS-settings.ini
  5. Place mod files as instructed
  6. Restart server

Method 3: Config File Tweaks

Some mods are just config changes in PalWorldSettings.ini.

A Quick Word on Ethics and Fun

On your own server, cheats and mods are fine if you’re using them responsibly…

  • Don’t use hacks on others’ servers
  • Be transparent with your own players

Wrapping Up: Your Server, Your Rules

Running a Palworld server puts you in control…

Admin commands = safe and useful tools.
Mods = powerful but need careful handling.
Use trusted sources, back up data, and test thoroughly.

Shape your Palworld experience. Stay ethical, have fun, and go catch some Pals!

Valheim Dedicated Server Save Location (Windows, Linux, Docker)

Need the exact Valheim dedicated server save location so you can back up or move your world? This guide shows the default paths on Windows and Linux, how to change them with -savedir, and where hosts and Docker keep your files.

  • Paths for Windows, Linux, and Docker installs
  • How to set -savedir for predictable backups
  • Steps to move or restore a world without corruption
Valheim dedicated server save location guide
Keep your Viking saga safe by knowing exactly where the world files live.

Default Valheim dedicated server save location

Each world has two files you must keep together: YourWorld.db and YourWorld.fwl (plus any .old backups). If you do not set -savedir, Valheim uses these defaults:

  • Windows: %USERPROFILE%/AppData/LocalLow/IronGate/Valheim/worlds
  • Linux: ~/.config/unity3d/IronGate/Valheim/worlds or worlds_local

Set your own save folder with -savedir

Point saves to a clean, backed-up directory so you always know where your world lives. This keeps your Valheim dedicated server save location predictable for backups.

@echo off
set SAVE_PATH="C:\ValheimSaves"
valheim_server -savedir "%SAVE_PATH%" -world "MyWorld"

Linux example:

#!/bin/bash
SAVE_PATH="/home/steam/valheim_saves"
./valheim_server.x86_64 -savedir "$SAVE_PATH" -world "MyWorld"

Docker and hosting panels

  • Docker: Bind a volume to /home/steam/.config/unity3d/IronGate/Valheim/worlds (or your custom -savedir) in docker-compose.yml.
  • Game panels: Look for a saves/worlds folder in the file manager or a field for -savedir in the startup parameters.
  • Cloud backups: Zip both the .db and .fwl files before downloading.

Move or back up your Valheim world safely

  1. Stop the server (avoid copying while it is running).
  2. Copy .db, .fwl, and any .old files from the save directory.
  3. Paste them into the new server’s save folder (or your backup location).
  4. Match the -world name to the file names, then start the server.
  5. Join and confirm the world loads before deleting old copies; verify the Valheim dedicated server save location is the one you expect.

Troubleshooting missing or reset worlds

  • Double-check the server is launching with the same -world name.
  • If a new world appears, you likely pointed to the wrong -savedir or folder.
  • Restore from .old backups if the main files are corrupted.
  • On Linux, verify file ownership for the steam user running the service.

FAQ

Can I mix local and dedicated saves? Yes—just copy both files together and keep the same world name.

Does cloud save sync worlds? No, you need manual backups or a panel that syncs the save folder.

Where to learn more? Check the Valheim dedicated server wiki for additional flags.

Want hands-off hosting? See our Valheim server tips to keep your world online while you focus on raids.


Food Preparation Table Valheim

So, you’re tired of dying in Valheim? Yeah, me too. Turns out, bashing Greydwarfs and sailing across the ocean requires more than just a sharp axe and a brave heart. You need good food. And to make good food, you need the Food Preparation Table. Think of it as your Viking kitchen’s MVP. If you want your crew eating well together, a Valheim server hosting world keeps everyone fed without wipes.

This isn’t just some fancy furniture piece; it’s the gateway to better stats, tougher fights, and longer expeditions. Let’s break down everything you need to know to master the Food Preparation Table and become a culinary god in Valheim.

Why You Absolutely Need a Food Preparation Table

Seriously, why are you even reading this if you don’t know how important food is? Alright, alright, I’ll spell it out. Food in Valheim isn’t just for healing; it’s your main source of increasing your maximum health and stamina. The better the food, the higher your stats. Higher stats mean you can swing your axe longer, take more hits, and run further without collapsing in a sweaty heap.

Early game, you might be surviving on grilled neck tails and raspberries (been there!). But trust me, once you start crafting meals on the Food Preparation Table, you’ll feel like a whole new Viking. We’re talking about jumping from 50 health to 100+, easily.

Crafting Your First Food Preparation Table: The Recipe

Okay, enough talk, let’s get building. Here’s what you need to craft your very own Food Preparation Table:

  • Workbench: You should have this already. If not, gather some wood and get building! The Food Preparation Table requires you to be near a Workbench to craft it.
  • Flint (4): You’ll find Flint along the shores of rivers and lakes in the Meadows biome. Keep an eye out for those greyish-white stones.
  • Wood (2): The most basic resource. Chop down some trees!

Once you have the materials, equip your hammer, open your crafting menu (right-click), and find the Food Preparation Table. Place it somewhere convenient in your base, preferably near your cooking stations.

Essential Recipes to Start With

Now that you have your table, let’s cook! Here are some simple but powerful recipes you can make right away:

  • Cooked Meat: Just toss some raw meat on the Cooking Station (unlocked early on by using stones and wood). This is your basic health booster.
  • Grilled Neck Tail: Kill those annoying Neck lizards near water and grill their tails. Gives a decent stamina boost.
  • Carrot Soup: This one requires you to plant carrots first. Get carrot seeds from the Black Forest by finding wild carrots. Once you have carrots, combine 1 carrot, 1 mushroom, and cooked meat on the Cauldron to make Carrot Soup. This is a fantastic early-game health and stamina combo.

These recipes are your bread and butter (or, you know, your cooked meat and berries) in the early game. They’ll give you a noticeable edge in combat and exploration.

Leveling Up Your Kitchen: Upgrading the Food Preparation Table

This is where things get interesting. The Food Preparation Table itself can’t be upgraded directly. Instead, you need to build nearby crafting stations that provide a “Comfort” bonus. These stations essentially upgrade your overall cooking potential and unlock more advanced recipes.

Here’s a breakdown of some key upgrades:

  • Cauldron: A must-have. Build this near your Food Preparation Table. It’s required for making soups, stews, and other advanced dishes. To make a Cauldron you will need Tin. Tin Ore is found along the shores of the Black Forest biome. You need to build a smelter and charcoal kiln to convert tin ore into tin bars.
  • Spice Rack: Unlocks new recipes and improves existing ones. You’ll need Fine Wood to make the Spice Rack. Fine wood is gathered from Birch and Oak trees which are found in the Meadows biome. You’ll need a bronze axe to chop these trees down.
  • Butcher’s Table: Build this to unlock even more meaty meals. The Butcher’s Table requires Iron.
  • Oven: Bake delicious breads and pies. To build the oven you will need Iron, Fine Wood, Stone and Black Marble.

The more comfort items you have nearby, the more advanced recipes you can unlock, and the better the food you can make. It’s an investment that pays off big time.

Advanced Recipes: Fueling Your Viking God

Once you’ve upgraded your kitchen, you can start crafting some truly epic meals. These will give you massive boosts to your health and stamina, allowing you to take on tougher enemies and explore more dangerous areas. Here are a few examples:

  • Lox Meat Pie: Requires Lox meat (from the Plains biome), Cloudberries (also Plains), Barley Flour (requires farming Barley in the Plains), and eggs. This is a fantastic health and stamina food for late-game players.
  • Serpent Stew: Serpent meat (from sea serpents), mushrooms, and honey. A great stamina food for sailing long distances.
  • Blood Pudding: Thistle, Bloodbag, barley flour. Good all round stats.

Experiment with different recipes and find what works best for your playstyle. Don’t be afraid to venture into new biomes to find rare ingredients. The rewards are worth it!

Optimizing Your Food Buffs: Stacking and Timing

Knowing what to eat is only half the battle. You also need to understand how food buffs work. Here are a few key tips:

  • Eat three different foods: You can have up to three food buffs active at a time. Each food has its own duration, so choose wisely.
  • Prioritize Health and Stamina: Balance your food choices to maximize both health and stamina. Some foods provide more of one than the other.
  • Pay Attention to Duration: Some foods have longer durations than others. Eat longer-lasting foods first, then supplement with shorter-duration buffs.
  • Eat Before a Fight: Obvious, but worth repeating. Don’t wait until you’re already taking damage to eat. Prepare your meals before heading into battle.

By strategically stacking your food buffs, you can become a force to be reckoned with in Valheim.

Pro Tips for Food Preparation Mastery

Alright, you’ve made it this far. You’re practically a Viking chef already. Here are a few extra tips to help you become a true master of the Food Preparation Table:

  • Farm, Farm, Farm: Setting up a farm is crucial for consistent access to ingredients like carrots, turnips, barley, and onions.
  • Explore Every Biome: Each biome has unique ingredients to discover. Don’t be afraid to venture into new areas, even if they’re dangerous.
  • Use the Wiki: The Valheim wiki is your best friend. It has detailed information on every recipe, ingredient, and crafting station.
  • Experiment: Don’t be afraid to try new combinations of foods. You might discover some hidden gems.
  • Build Multiple Cooking Stations: Having multiple Cooking Stations and Cauldrons will speed up your food preparation process.
  • Automate: Use hoppers and conveyors to automatically feed ingredients into your cooking stations. This is especially useful for large-scale farming operations.

Final Thoughts: From Zero to Hero (with a Full Stomach)

The Food Preparation Table is more than just a piece of furniture; it’s a critical tool for survival and success in Valheim. By mastering its recipes, upgrades, and techniques, you can transform yourself from a weakling Viking into a powerful warrior capable of conquering any challenge. So get cooking, and may your stomach always be full! Now go forth and conquer Valheim, one delicious meal at a time!

So, what are you waiting for? Get out there and start cooking! Your Viking awaits!


How to Change Your Character’s Name in Valheim

Valheim, the popular survival game, has players exploring, fighting, and building in a Viking-themed world. But what if you’ve named your character in haste and now wish for a change? While the game doesn’t offer a direct way to rename your character, don’t worry! This guide will walk you through the available methods to help you change your character’s name in Valheim, ensuring you won’t be stuck with a name you’re unhappy with.

Use a New Character

The simplest solution might be to create a new character with your desired name. Before you do, make sure to transfer all your gear to a chest that your new character can access. This way, you won’t lose your hard-earned equipment, though you will have to rebuild your character’s skills.

Try Mods to Change Your Name

Mods are your go-to option for changing your character’s name in Valheim. The modding community has developed tools that allow you to edit both your name and appearance from the game’s main menu.

  • Find a Reliable Mod: Look for a mod that allows character name changes. Websites like NexusMods or Thunderstore.io are great places to start.
  • Install the Mod: Follow the installation instructions provided with the mod. Make sure to back up your game files before installing any mods to avoid losing data.
  • Change Your Name: Once the mod is installed, you can change your character’s name (and appearance) as you like. Some mods let you do this from the main menu, making the process straightforward.

Using Console Commands

For those comfortable with using console commands, there’s a way to adjust your character’s skills to match those of a newly named character. This method doesn’t change your current character’s name but allows you to create a new character with the desired name and skill levels.

  • Enable Console Commands: Press F5 to open the console.
  • Create a New Character: Make a new character with your desired name.
  • Adjust Skills: Use console commands to set the new character’s skills to match your original character’s levels.
  • Transfer Gear: Move your equipment from your old character to the new one.

Important Considerations

  • Back Up Your Data: Always back up your game files before using mods or console commands to avoid losing your progress.
  • Be Cautious with Mods: Not all mods are created equal. Read reviews and instructions carefully to ensure compatibility and stability.
  • Character Skills: Remember, if you start fresh with a new character or use console commands, you’ll need to build your character’s skills back up, unless you adjust them via commands.

While Valheim doesn’t offer an in-game feature to rename characters, these workarounds provide viable options. Whether you choose to create a new character, use mods, or employ console commands, you can align your character’s name with your Viking saga. As the Valheim community grows and evolves, perhaps more solutions will emerge. Until then, these methods will ensure your character carries a name you’re proud of on their journey through the Norse purgatory.


How to Connect to an Enshrouded Server

Follow these steps to add your Enshrouded server to Steam favorites and connect to it for an immersive gaming experience.

Adding Your Server to Favorites

Adding an Enshrouded Server To Favorites

  1. Accessing Game Servers in Steam:
    • Open your Steam client.
    • Click on “View” in the top toolbar.
    • From the drop-down menu, select “Game Servers”.
  2. Navigating to Favorites:
    • In the “Game Servers” dialog, switch to the “Favorites” tab.
    • Click the select box in the top-right corner.
    • Scroll down and select “Enshrouded”.
  3. Adding to Favorites:
    • In the favorites list for Enshrouded, click the plus (+) symbol at the bottom of the dialog.
  4. Entering Server Details:
    • A prompt will ask for your server’s IP address.
    • Type in the IP address and port of your Enshrouded server (e.g., “192.168.0.73:15637”).
    • Click “OK” to add your server.
  5. Verifying Server Addition:
    • Your server should now appear in the game servers list. You’re ready to play Enshrouded!

Connecting to Your Enshrouded Server

Connecting an Enshrouded Server

Connecting a Dedicated Enshrouded Server

  1. Launching Enshrouded:
    • Open Enshrouded.
    • Click on the “PLAY” option.
  2. Joining a Game:
    • Choose the “JOIN” option.
  3. Selecting Your Server:
    • Your server should be listed at the top.
    • Click on your server or the “Join” button to connect.
  4. Enjoy the Game:
    • You are now connected to your Enshrouded server. Happy gaming!

Resolve the Palworld server update that erases player progress.

We acknowledge that losing progress on your Palworld server can be annoying, and we are sorry if you have encountered any difficulties. It has been determined that there is a definite bug in the game, and the developer needs to address it in order to fix it. This serious bug is known to the developer, and fixing it is probably their top priority. This problem is now plaguing many hosting providers, including official servers, and is impacting a lot of players.

For now there is no 100% successful method to recover your data, however some players reported those workaround as successfull.

Method 1

Have one player join the server (BUT DO NOT CREATE A NEW CHARACTER), simply just stay in the new character creation menu.

  • Now Stop the server.
  • Wait 10-15 minutes.
  • Start the server.
After that, your character's progress should be back, and you can continue playing.

Method 2

Look through the folder that player and world data are kept in on the Palworld dedicated server. You can find that folder in "Game Data" section in files manager.

It is likely that server files are contained in a folder with the name 0 (the number zero).

Go to 0 and open the folder. The good news is that your Palworld server still has your older server files if you have more folders here. If you open one of those directories, it should includes: Players, Level.sav and LevelMeta.sav

A snapshot of the playerdata folder on a Palworld server The "ID" of the server version is a random string of characters that you must notice in the folder name. Once your server is up and running, you might have two folders, each with a unique random ID. Select the folder you wish to restore by looking at its last changed date before proceeding to the next step.

Getting the Saved Data Reference Back
Open the GameUserSettings.ini (switch from "Game Data" to "Server Config") after that. Palworld lost save data fix 
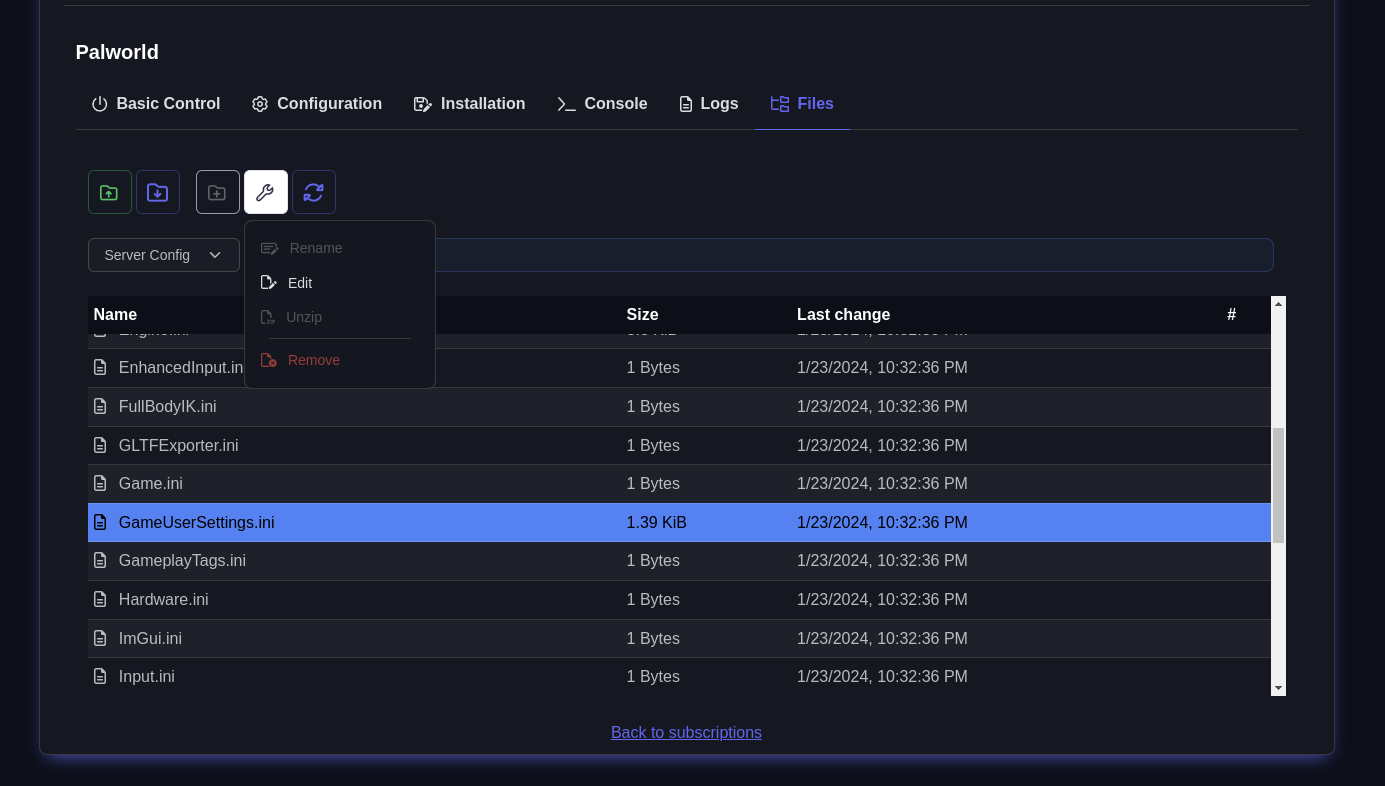
Change the DedicatedServerName entry in this file to the ID found in the folder in the previous step. You may need a different ID from a different folder if the ID from the previous step is already visible in this line.

Still not functioning?

Even while many users find success with this step, there are still some situations in which your server will not recognize your player and server data. Fear not, as there is one last thing you may do that has supposedly helped a lot of players:

  1. Edit GameUserSettings.ini and clear ID from the option: DedicatedServerName=
  2. Launch the Palworld server.
  3. You should be prompted to create a new character when you join the server. Join the Palworld server and make a new character.
  4. Once more, stop your Palworld server.
  5. After completing it in the preceding step, change the map ID back to the old value.
  6. Launch your server, and you ought to be able to connect using your other character from before.


Palworld – How to connect a server?

Q: I’ve set up a dedicated server, but when I set a ServerPassword, I don’t get prompted for a password when logging in via direct IP entry, and I can’t log in.


A: We’re aware of this issue and plan to address it in the next update. In the meantime, if you need to secure the server with a password, you can configure it as a community server. This will make it accessible from the in-game community server list, prompting you to enter a password upon entry.

  1. Enter IP:port and then click “Connect”.

    Palword Server IP Port

  2. Because of a bug, server is not going to ask you for password.

    Palword Server Password Bug
  3. Click “OK” and go the “Multiplayer” section again.

    Palword Server Multiplayer

  4. Go to “Recent servers”

    Palword Recent Servers

    Your server is going to be on the list.

  5. Click a few times.

  6. Enter the password and play

    Palword Server Password


  7. Reference


Install a Satisfactory Dedicated Server on Linux (SteamCMD Guide)

Satisfactory dedicated server Linux setup is straightforward with SteamCMD. This expanded guide covers prerequisites, installation, ports, a systemd service, updates, backups, performance tweaks, and troubleshooting so your factory runs smoothly.

  • Satisfactory dedicated server Linux prerequisites and open ports
  • SteamCMD install with app_update 1690800 and validation
  • Systemd service, updates/backups, and performance tips
Satisfactory dedicated server Linux setup
Keep your Satisfactory dedicated server on Linux stable with correct ports and updates.

Satisfactory dedicated server Linux prerequisites

  • 64-bit Linux (Ubuntu/Debian/CentOS/etc.) fully updated.
  • Non-root user with sudo rights.
  • Firewall/router access to open UDP 7777, 15000, 15777.
  • Disk: ~10 GB free for binaries and saves; RAM: 8 GB+ recommended.
  • Basic terminal access and ability to forward ports.

1) Install SteamCMD

sudo apt update && sudo apt upgrade -y
sudo apt install -y steamcmd

On other distros, install the SteamCMD package or download from Valve’s docs. This is required for any Satisfactory dedicated server Linux install.

2) Install the Satisfactory dedicated server

mkdir -p ~/SatisfactoryDedicatedServer
steamcmd +login anonymous   +force_install_dir ~/SatisfactoryDedicatedServer   +app_update 1690800 validate   +quit

Rerun the +app_update 1690800 validate command whenever you need to patch or repair your Satisfactory dedicated server on Linux.

3) First launch and in-game config

cd ~/SatisfactoryDedicatedServer
./FactoryServer.sh

Launch once to generate configs, then join from the game client as the first admin to set server name and password. Configs live in ~/SatisfactoryDedicatedServer/FactoryGame/Saved/Config/.

4) Optional systemd service

sudo tee /etc/systemd/system/satisfactory@.service <<'EOF'
[Unit]
Description=Satisfactory Dedicated Server (Linux)
After=network.target

[Service]
Type=simple
User=%i
WorkingDirectory=/home/%i/SatisfactoryDedicatedServer
ExecStart=/home/%i/SatisfactoryDedicatedServer/FactoryServer.sh
Restart=on-failure

[Install]
WantedBy=multi-user.target
EOF
sudo systemctl daemon-reload
sudo systemctl enable --now satisfactory@$(whoami)

This keeps the Satisfactory dedicated server Linux process running after reboots. Adjust paths if you installed elsewhere.

5) Port forwarding and firewall

  • Forward/allow UDP 7777, 15000, 15777 to your server’s LAN IP.
  • UFW example: sudo ufw allow 7777/udp && sudo ufw allow 15000/udp && sudo ufw allow 15777/udp
  • Check your public IP and make sure your router points to the correct host.

6) Updates, backups, and maintenance

  • Update: Rerun the SteamCMD command with +app_update 1690800 validate and restart the service.
  • Backup saves: Copy ~/SatisfactoryDedicatedServer/FactoryGame/Saved/SaveGames/ before major patches.
  • Logs: Review Saved/Logs for errors after crashes.

7) Performance tips for Satisfactory dedicated server Linux hosts

  • Keep the server on SSD storage to reduce stutter during autosaves.
  • Run fewer background services; pin the server to dedicated cores if available.
  • Restart weekly to clear memory; schedule during off-hours.
  • Lower foliage/creature spawns via server settings if performance dips with many players.

Troubleshooting

  • Server not starting: Check logs in Saved/Logs; rerun with validate; confirm executable permissions.
  • Players can’t connect: Recheck UDP ports/forwarding and firewall rules; verify the correct public IP.
  • SteamCMD errors: Clear ~/Steam cache or reinstall SteamCMD; try again.
  • Configs missing: Run the server once so it creates config files, then stop and edit.
  • Performance issues: Add RAM/CPU or reduce player count and creature density.

Want an easier path than self-hosting? See our Satisfactory server hosting guide for managed options with fast setup.


How to setup ARK Survival Evolved Server


Adding mods


  1. 1. Run the ARK server for the first time to generate config files
  2. 2. Connect via FTP
  3. 3. Go to: ark/bin/ShooterGame/Config

Find GameUserSettings.ini and edit this file.
In the file content find [ServerSettings] section.
At the end of the section append line:
ActiveMods=731604991
731604991 is a mod id – you need to take the id from the Steam and put there. If you like to add more mods, separate them with coma:
ActiveMods=731604991,731604992


Connecting


Adding a custom ARK server is a bit tricky.
1) Open Steam; go to “View” (top menu), Servers.

ARK Dedicated Server Setup How to Explained

2) Go to Favorites tab; click “add a server”; put: us2.servers.supercraft.host:10085
3) Save and refresh – you should see ARK #xxxxxx (v345.22) on the list
4) Close servers window, run Ark
5) Select “Favorites” from the combo box with server types

Your dedicated ARK Survival evolved server should be there.


Top